AX880 Access point - getting started instructions
1. Unpack the box and take out the access point
In the box, you should find,
- 1x ax880 Access point
- 1x ceiling mounting plate (attached)
- 4x mounting screws
- 1x 1meter cat5e network cable

Optionally, you may also have purchased a 12V power adapter.
2. Connect the cables
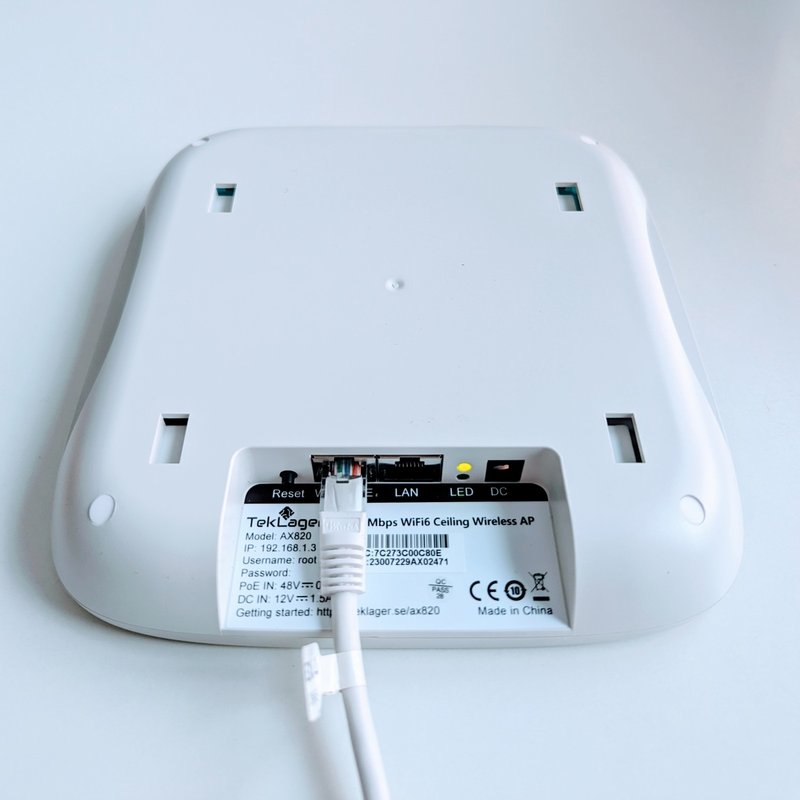
You don't need a power adapter if you have a Network Switch that supports Power Over Ethernet (POE). In that case, connect a cable from your Switch to the port marked as POE on the access point. The AP should power on after a few seconds, and the LED in front should light up WHITE.
If you don't have a POE switch, you will need a 12V power adapter. Connect it to the DC port.
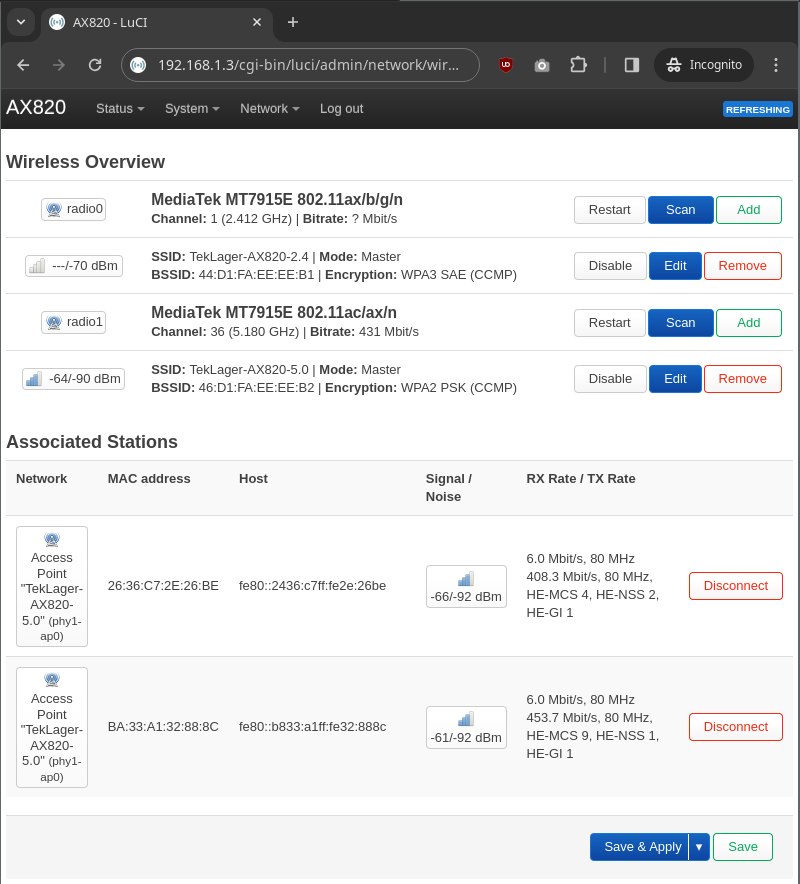
At this point, you should be able to see two wirless networks with the following SSIDs.
| Network 1 | Network 2 | |
| SSID | TekLager-AX880-2.4 | TekLager-AX880-5.0 |
| Password | TekLager123 | TekLager123 |
| Frequency | AX / Channel 1 / 40Mhz | AX / Channel 36 / 80Mhz |
3. Access the web interface
If your network is configured to be 192.168.1.0/24 you should be able to access the access point directly without any configuration.
The web interface should be accessible at http://192.168.1.4/

username: root
password: blank (leave empty)
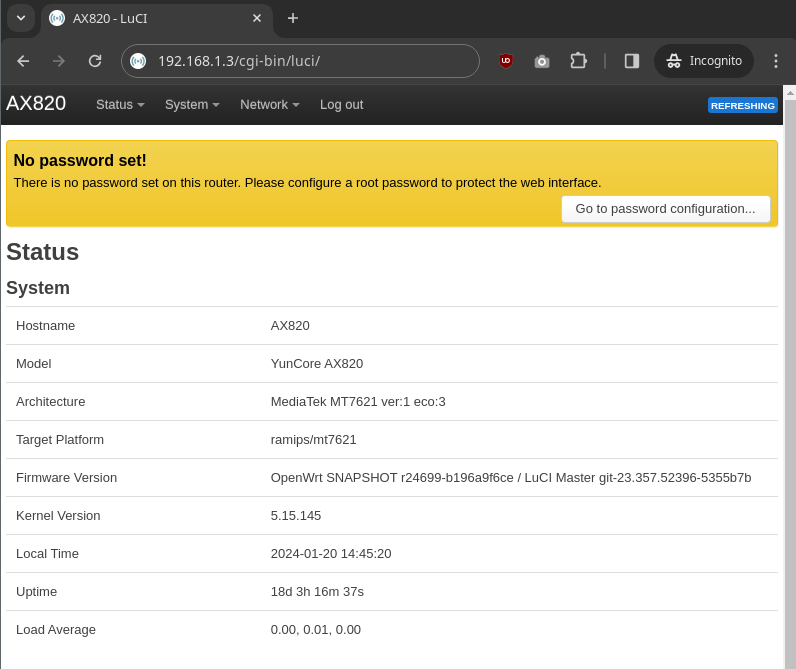
It's a good idea to set a root password. Click the button in the prompt and fill in a new password.
4. Reconfigure the WiFi SSID and password
You may want to personalize your SSIDs and change the default network passwords.
Go to Network => Wireless => Click Edit button => Wireless Security Tab => Enter new password => Click Save => Click "Save & apply"
5. (optional) If you have multiple access points
If you have multiple Access Points, you will need to assign a different IP address to each one of them. Otherwise, all of them will have the same 192.168.1.4 address, and things won't work well.
Go to Network => Interfaces Tab => Click Edit => Change the IPv4 address => Click Save => Click "Save & Apply"
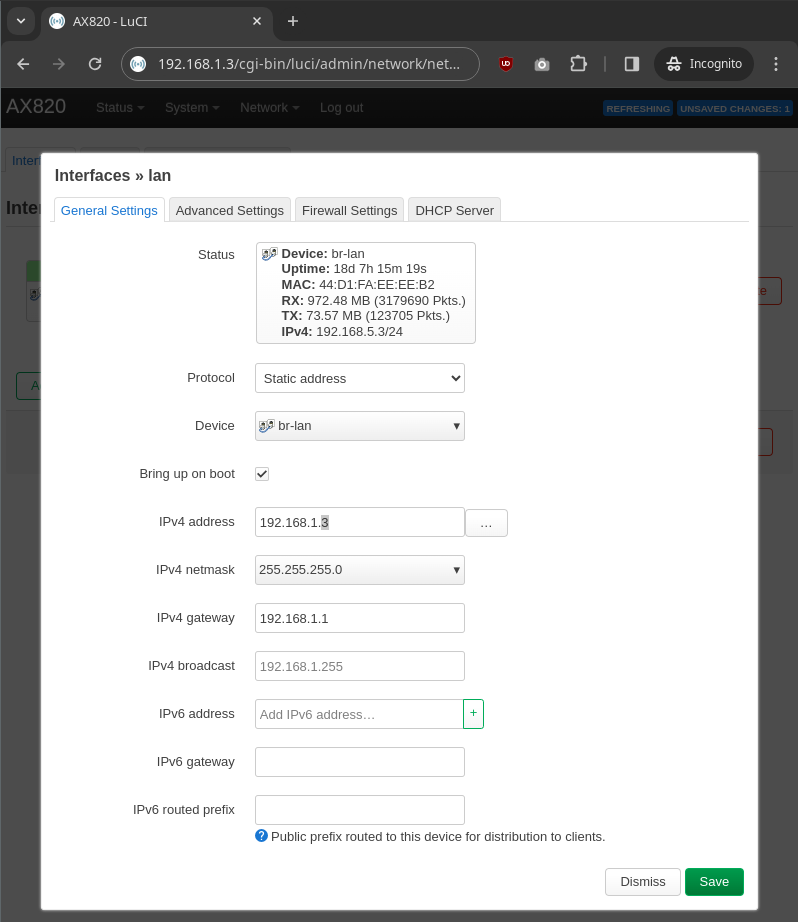
Each Access Point must have a different IP address.
6. (optional) If your network is not 192.168.1.1
If your network is not configured to the (typically default) 192.168.1.0/24 address space, you will need to reconfigure the IP of the Access Point before you connect it to the network.
The easiest way to do this is to:
- Temporarily set a static IP address on your PC to 192.168.1.1,
- Connect a cable between the access point (POE port) and your PC.
- Power on the access point with a DC adapter.
At this point, you should be able to access the web interface on http://192.168.1.4/ and change the IP address as outlined in step 6.