Connecting your new pfSense router to the network
Once you have received a parcel from us, follow these steps to connect your new router to the network.
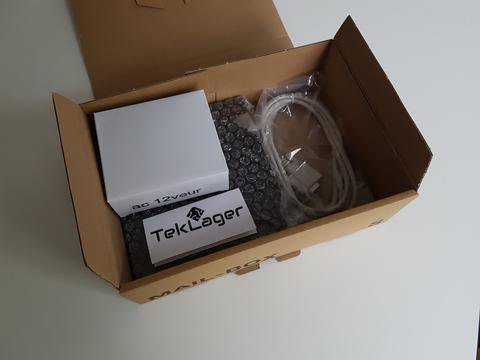
1. Unpack the box and take out the router
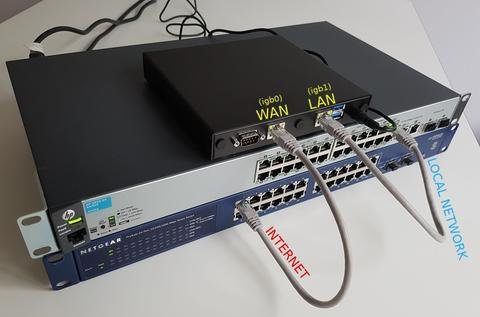
2. Connect the network cables
Unless you specified otherwise, device will come pre-configured with Port 0 as WAN and port 1 as LAN.
WAN (wan) -> igb0 -> DHCP
LAN (lan) -> igb1 -> v4: 192.168.1.1/24
Port 0 is the one closest to the serial port. Connect your internet cable into the WAN port and your switch (or access point) to LAN as shown on the photo:
If you have ordered 3-port router, your LAN port will be in the middle, and the third port will be left unconfigured.
If you have a 4-port TLsense device, the WAN is configured on port 1, LAN is most of the time on port 2, but sometimes pfSense detects it on port 4. If port 2 does not work, try to connect to port 4.
If you have a 6-port TLsense device, the WAN is on port 1, LAN is on port 2. The rest of the ports are not configured.
3. Connect the power adapter
Connect the power plug into your router before connecting it into the wall.
4. APU board is booting
Your router should now boot. It will take about a minute. Once it's booted you will hear a few beeps / happy sound.
5. Connect to the web interface.
If you chose pfSense for your router, you should now be able to connect from your computer via the web interface to the pfSense web control panel at: https://192.168.1.1/ You will see a security warning about self-signed SSL certificate. This is normal, and can be disabled from within the panel.
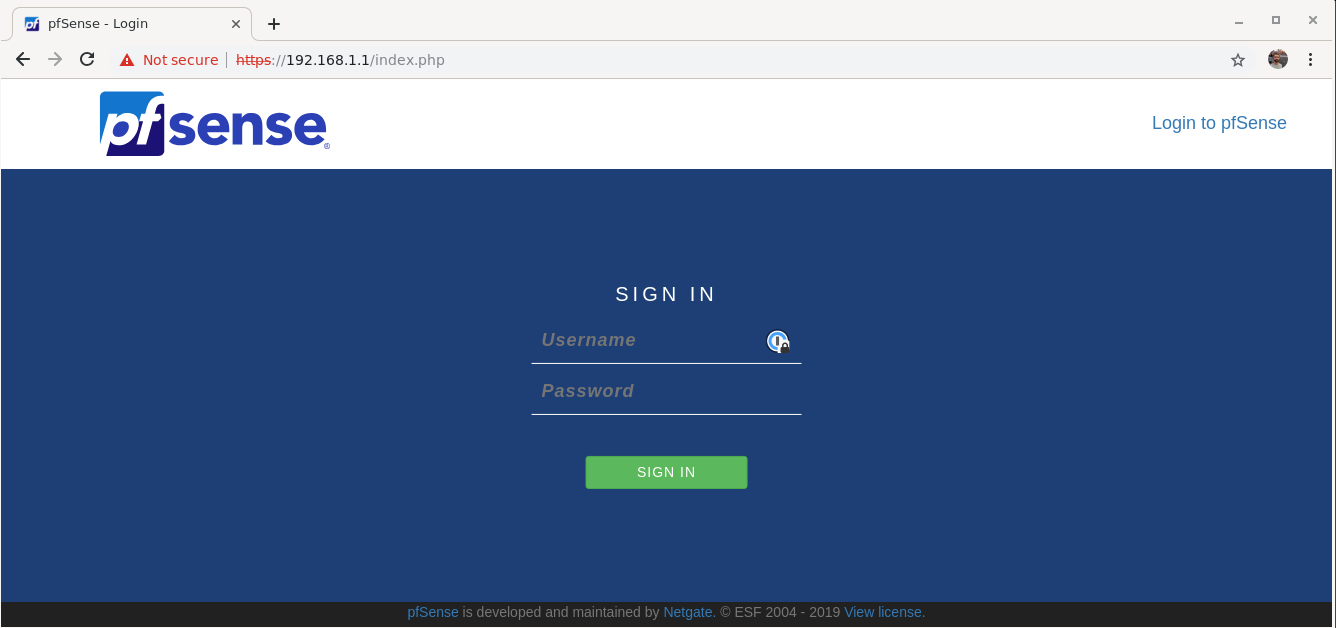
Default username and password to pfSense are:
Username: admin
Password: pfsense
We highly encourage you to change the password to something more secure.
After you log in, you can verify that the internet connetion works in the dashboard.
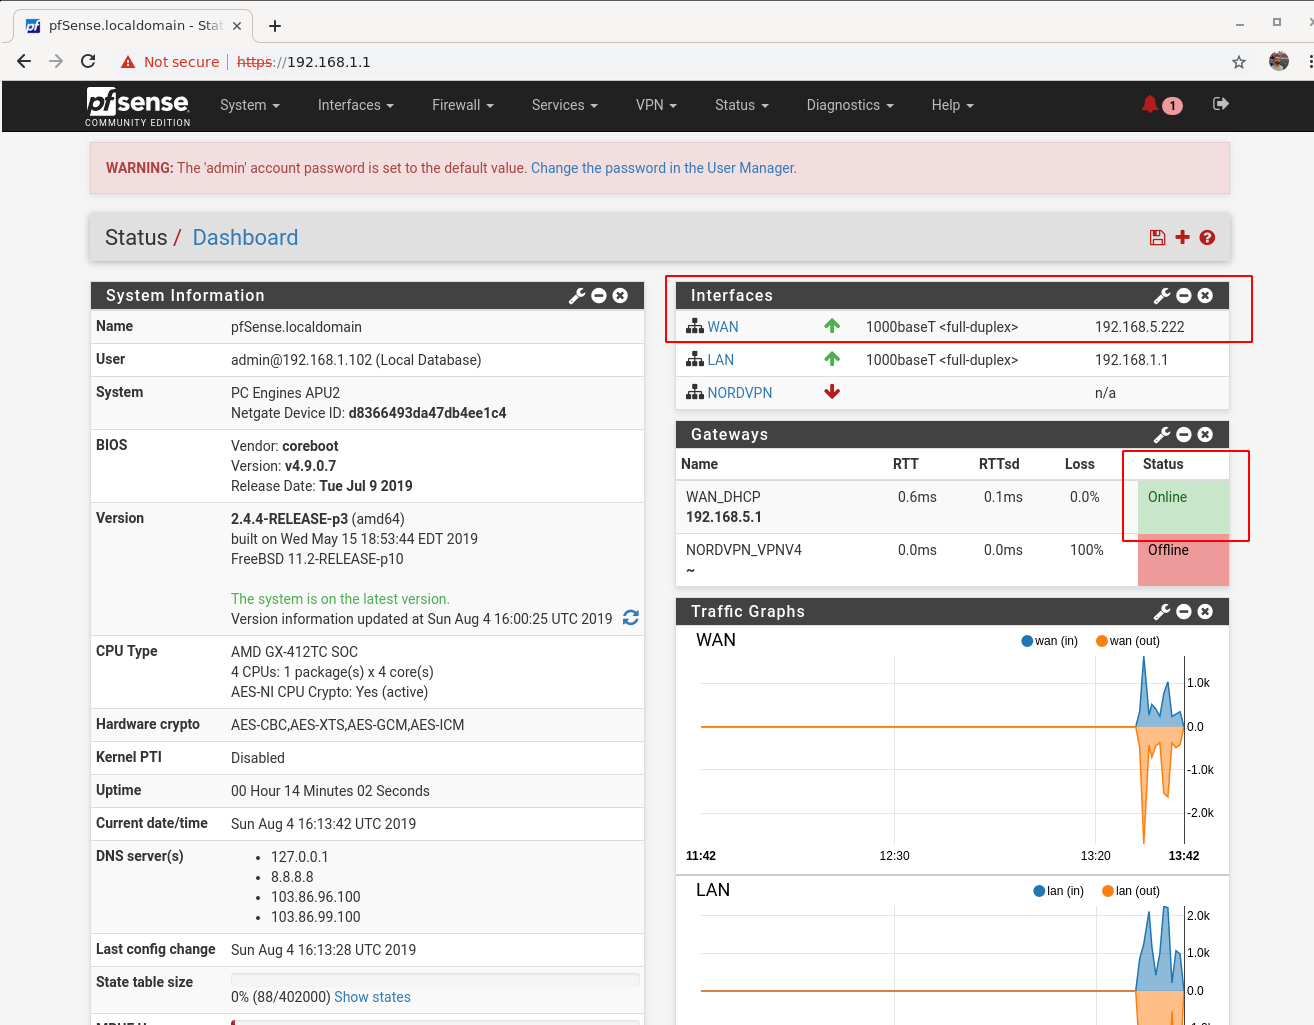
WAN should show your gateway IP. This will typically be your public IP.
LAN should show a local IP of your router: 192.168.1.1
Gateway should show "online".
NordVPN configuration
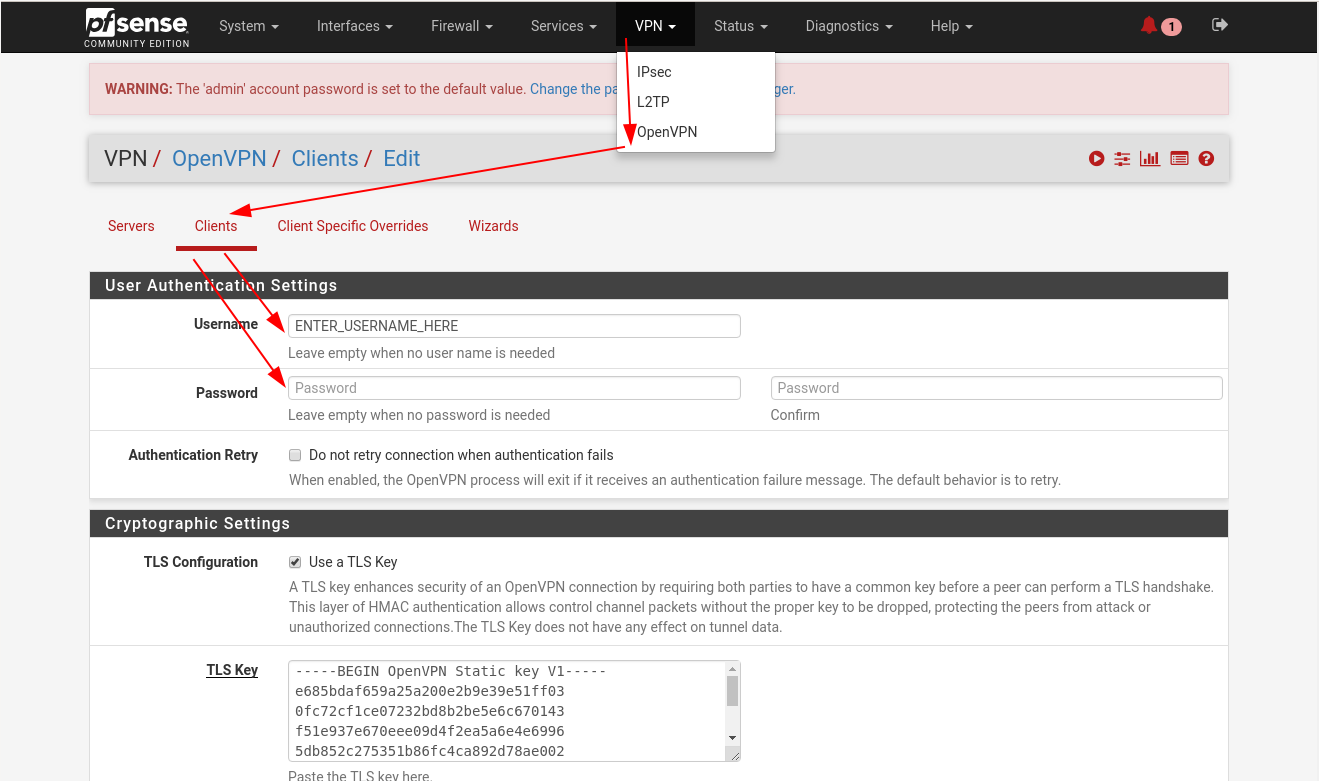
If you opted in to get NordVPN configuration with your router, you will also see NORDVPN interface in an "Offline" status.
To bring it online, you will need to enter your NordVPN username and password under VPN -> OpenVPN -> Clients -> Edit -> User Authentication Settings as shows below.
Username is your NordVPN email address
Password is the same as you use to log in to the NordVPN panel.
Use a different NordVPN server
If you see performance problems with your NordVPN connection, it's a good idea to reconfigure which server you use. By default we use server located in Stockholm, which may not be optimal for the location you are in.
See these instructions to use a different VPN server.
Something's wrong? - contact us we are happy to assist.