Installing Ubuntu LTS over serial console on APU board
Posted on
Installing Ubuntu on APU boards is easy if you know the steps. Other tutorials are recommending modification of the ISO file that is time-consuming and totally unnecessary.
Step 1:
Download Ubuntu Server LTS (amd64) image from here: https://ubuntu.com/download/alternative-downloads
At the time of writing, I'm using version 20.04.2. The full image name is ubuntu-20.04.2-live-server-amd64.iso
Step 2:
Flash the image on USB.
If you are using Linux, use dd:
sudo dd if=ubuntu-20.04.2-live-server-amd64.iso of=/dev/sdX; sync
sdX needs to be replaced with sdb, sdc, sdd or similar. Do not include a number. If you flash "sdb1" it won't work.
if you are using Windows, flash the image using Rufus: https://rufus.akeo.ie/
Step 3:
Insert the USB into the APU board, and use putty to connect over the serial cable, as described here.
Step 4:
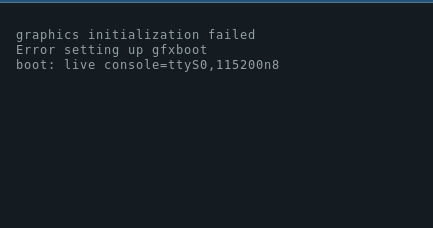
Ubuntu installer will boot, but it will complain that the graphics card is not detected. The error will look similar to this
graphics initialization failed
Error setting up gfxboot
This is expected because APU does not have a graphics card. The installation needs to be done through the serial console. You will get a boot: prompt. The command to type is
live console=ttyS0,115200n8

After you press enter, you may get two warnings similar to this
[    4.441954] sd 0:0:0:0: [sdb] No Caching mode page found
[    4.447545] sd 0:0:0:0: [sdb] Assuming drive cache: write through
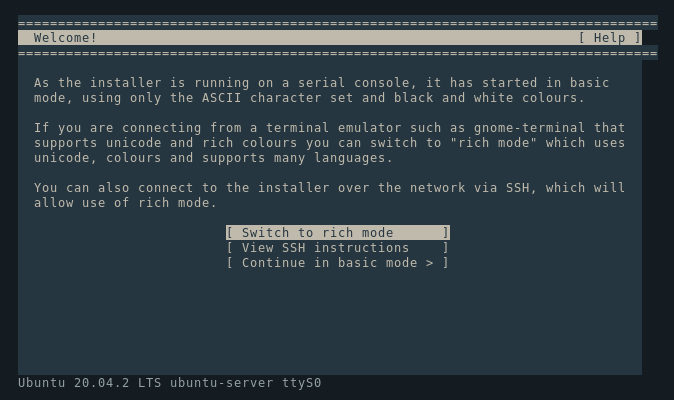
Don't be concerned. This is nothing to worry about. After a minute, you should get an installation menu similar to this, and you can proceed as you would on hardware that has a graphics card.

Continue in basic mode and follow the instructions on the screen. That's it.
Use Tab, Arrow Up, Arrow Down to switch between different options. Use the space bar to select/deselect checkboxes.
Toubleshooting
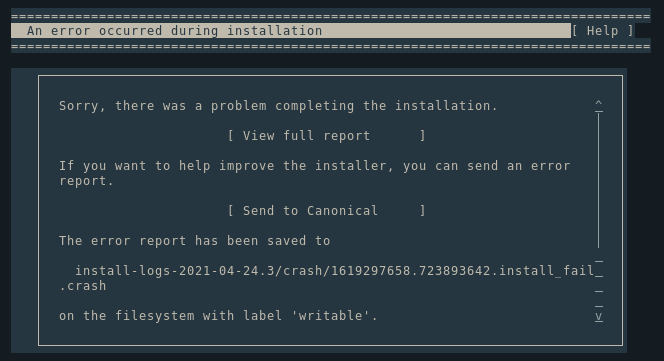
If you see "Sorry, there was a problem completing the installation", you probably have pfSense or OPNsense installed on the SSD drive.

For some reason, Ubuntu doesn't want to override filesystems it doesn't recognize. You will have to clean up the SSD before Ubuntu can be installed. Fortunately, the installer allows us to drop into shell to do just that. Use the Help menu in the upper right corner and choose "Enter shell". After that, you can type the following command to clean the SSD. This command will clean up the first 4MB of the drive, so it will look to the installer like a fresh SSD without any partitions.
dd if=/dev/zero of=/dev/sda bs=4M count=1;
exit
And try again