OpenWRT based travel router on APU2D4
Guest article provided by Bjarte, published on July 22, 2019
Introduction
I travel frequently for work and are often away for long periods of time with limited internet connectivity, in countries with restricted internet access. I therefore wanted to have a plug-and-play solution, that would work regardless of where I was, and what internet connection was available (wired, wireless or mobile). As I tend to work in remote locations, having the possibility of connecting external antennas (such as the Poynting XPOL-2) is a must-have.
Additionally, I wanted to have a portable media server, as well as a backup solution for pictures, videos and other files from my phone/tablet/laptop without having to resort to cloud-based services, as the connectivity is often very slow, and often paid for by the GB.
This article shows how I build and modified the APU2D4 to suit all my needs.
Features:
- Two local networks with corresponding WLAN SSIDs, one with and one without VPN tunnelling
- Each network has its own ethernet port, allowing for easy swapping
- Automatic (on reboot) and VPN tunnel using WireGuard/OpenVPN with no DNS/traffic leakage
- Plex Media Server with 2TB storage. More can be easily connected via the two USB3 ports
- Syncthing client for backing up content from my phone/tablet/laptop locally. External upload to my home server can be toggled on/off depending on the connection
- Very flexible internet connectivity via wired, wireless or mobile connection anywhere in the world
- Simultaneous 2.4/5 GHz WLAN with excellent performance
- Activity LED for VPN connection allows for a visual indication of connection status
- Portable solution, can be powered off my OmniCharge 20 for a battery-powered “emergency” router
- Lightweight and portable
Still WIP:
- Docker (almost there on OpenWRT 19.07, just missing the docker-proxy component)
- Final configuration of OLED screen
Hardware:
- PC Engines APU2D4 (link)
- Aluminium chassis (link)
- Sierra Wireless MC7455 LTE card (link)
- 2x wle900x (link)
- Seagate 2TB 7mm 2.5” HDD
- Kingston 480GB mSATA SSD
- 4GB pSLC SD card for OpenWRT (link)
- SIM-card extension with push socket (link)
- USB to mPCIe card w/ SIM-card reader (link (external) or link (internal))
- SSD1306 0.91” OLED display module (link)
- 2x TS9 female to SMA male (link) (optional, for use with portable panel antenna)
- 2x SMA male LTE antennas (link)
- 2x U.FL to SMA Female Bulkhead pigtails (link)
Tools required:
- Phillips head screwdriver
- Pliers to remove screws on console port
- Dremel or similar
- Hot-glue gun
- Crimping tool
Materials needed:
- Velcro strips
- Wires for OLED screen
- Crimping connectors for GPIO header
- Electrical tape
Design justifications:
- The USB to mPCIe adapter for the LTE card was used to allow for simultaneous 2.4 GHz and 5 GHz WLAN.
- The SIM-card extension was used as I wanted to be able to easily swap SIM cards without having to open the router (travelling in many different countries)
- The MC7455 card was chosen due to its LTE band compatibility
- The HDD was chosen as it was the largest capacity 7mm drive. A 9.5mm (or larger) drive will not fit.
- The SSD was chosen as it was the cheapest one available with a decent capacity
- The OLED screen was added just-because-I-can.
Modding and installation
A Dremel was used to cut the holes required to the OLED screen and the SIM card slot. The easiest place to mount them are on the front bezel, as this still allows for opening the chassis for maintenance or any changes.
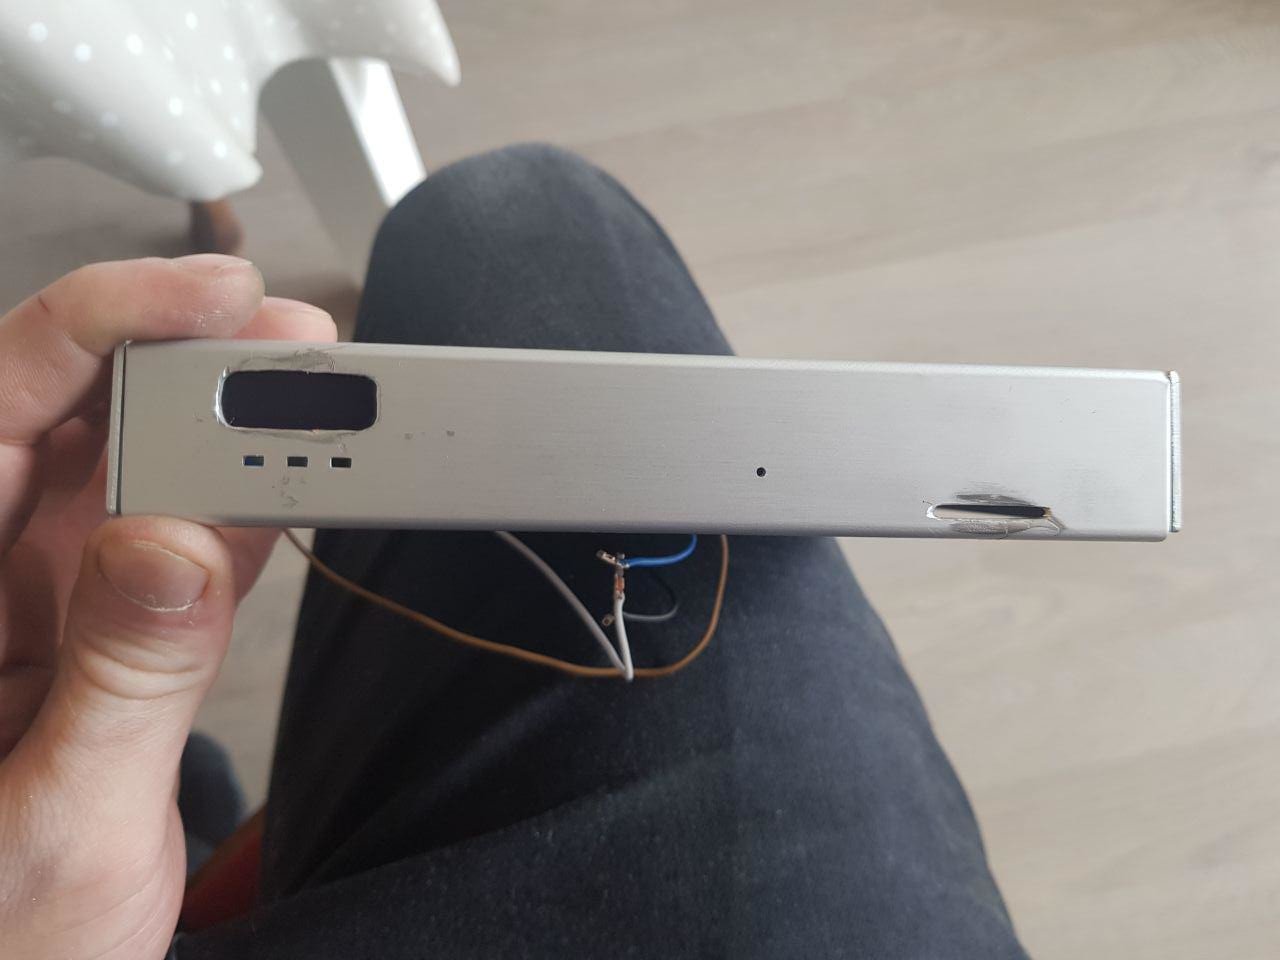
Fig: Front of chassis after cutting holes for SIM card slot and OLED screen, and mounting the screen.

Fig: OLED screen with soldered wires.
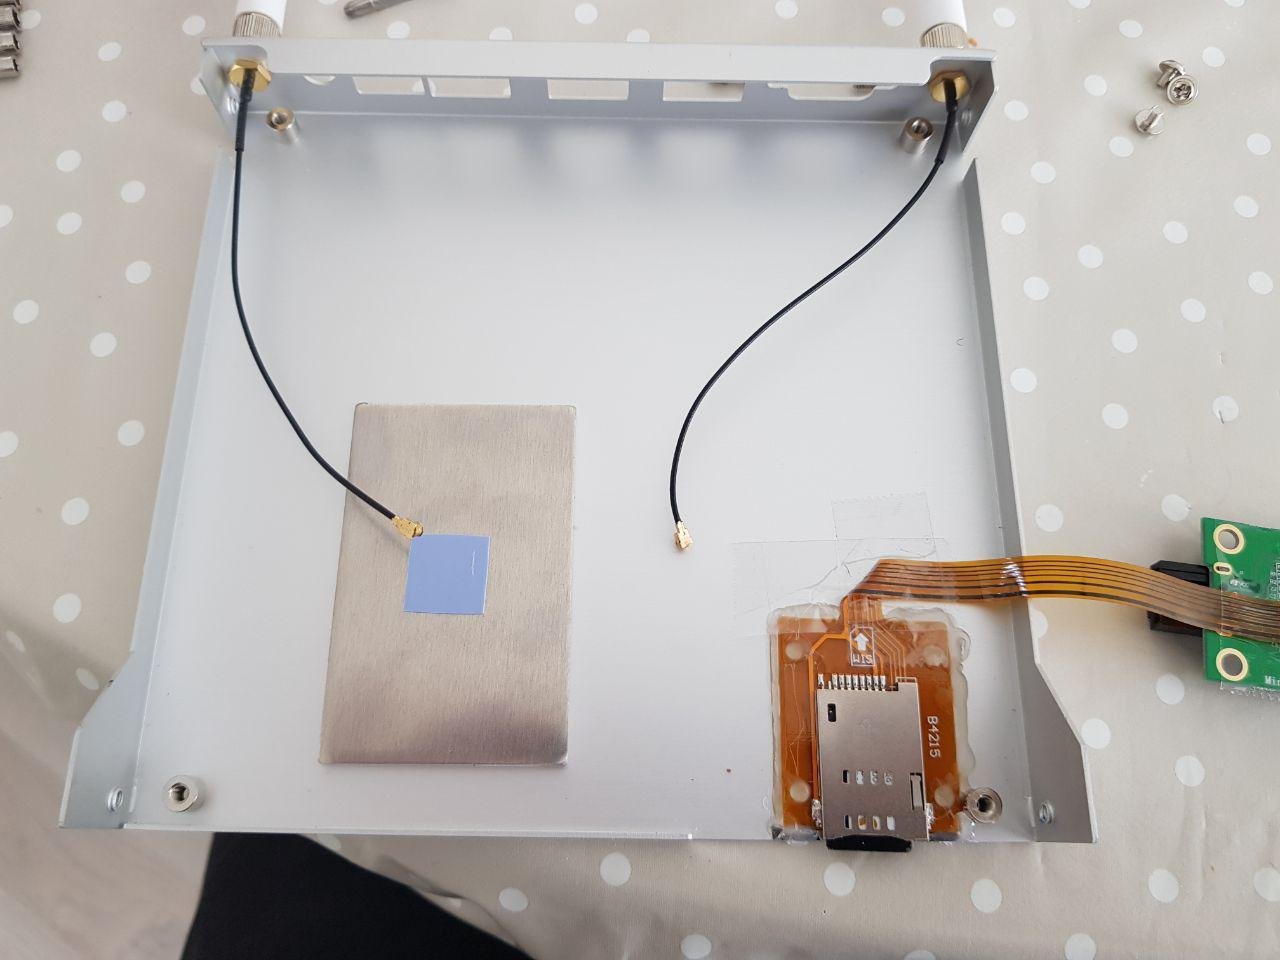
Fig: Bottom of chassis with SIM card extension hot-glued in place, and routed using tape

Fig: The mandatory “Hello World” message on the screen
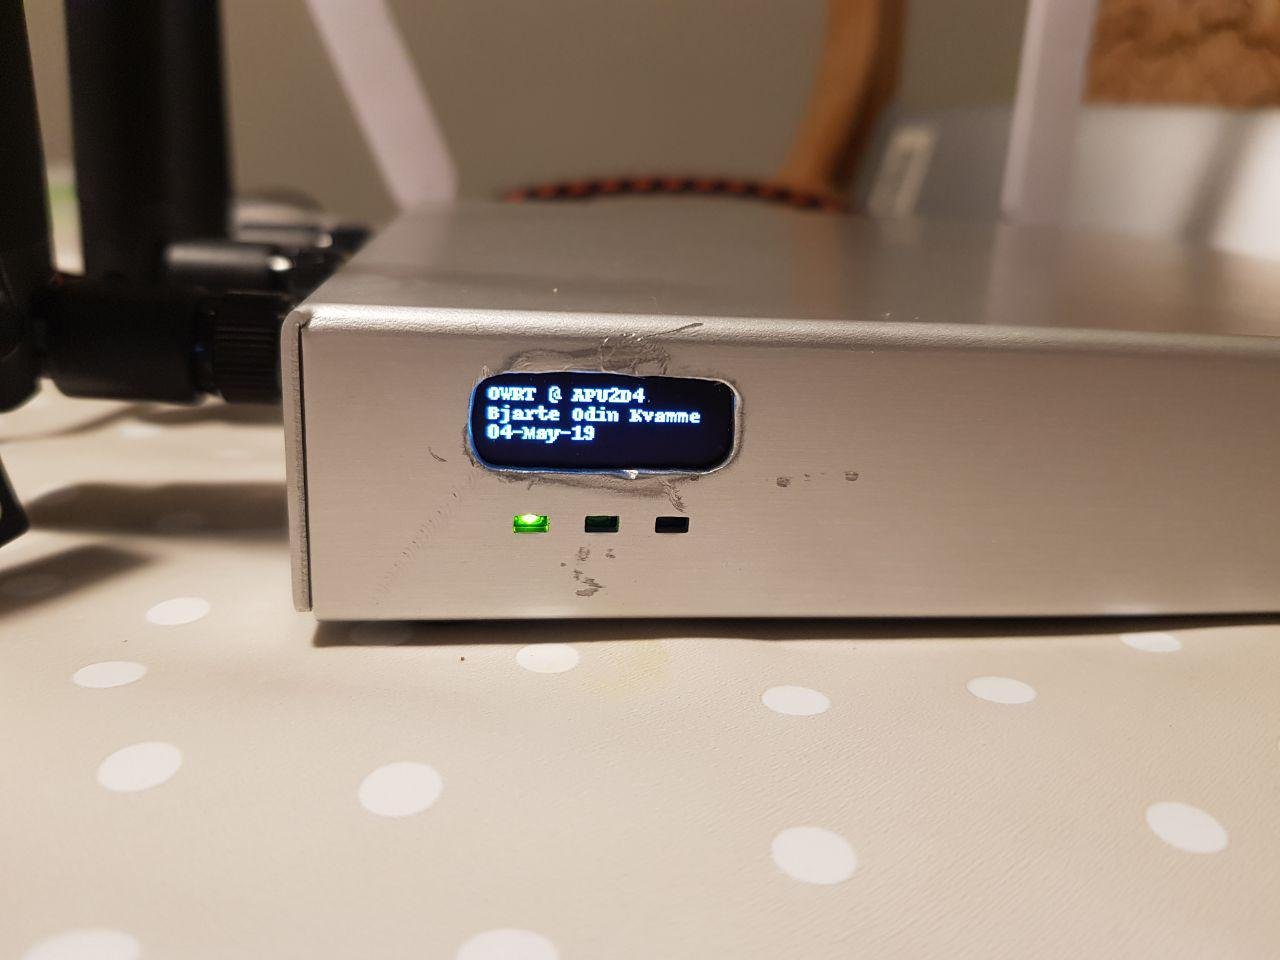
Fig: Screen customized with info, will use it to show VPN status, still fine-tuning the script. LED usage: Left (Power indicator), Mid (LAN activity), Right (VPN activity)
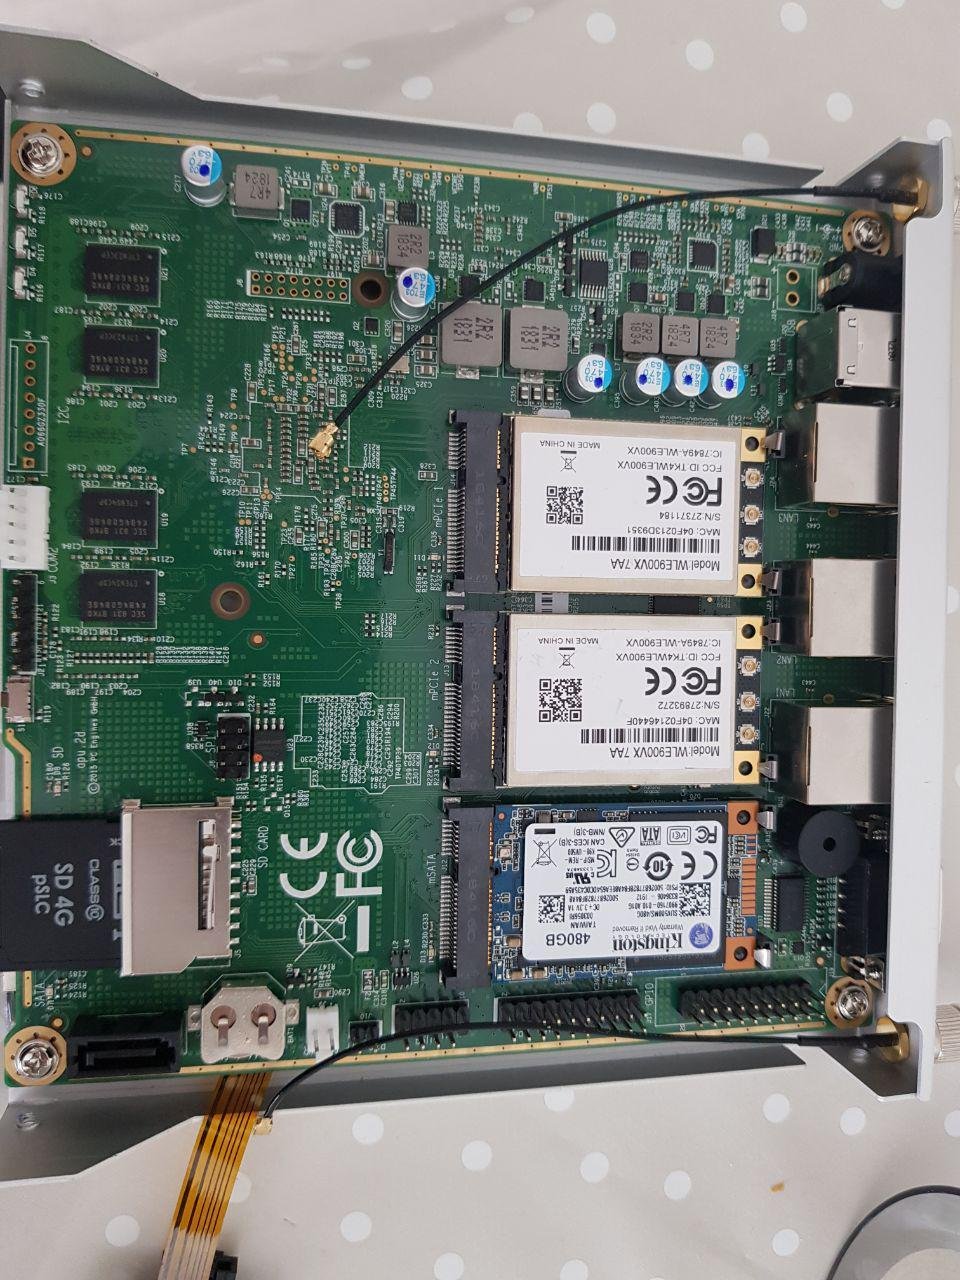
Fig: Internal view prior to any cluttering. mPCIe slots are populated with (top-to-bottom): wle900x, wle900x, mSATA SSD. 4GB pSLC SD card for OpenWRT. Pig tails are for WWAN.
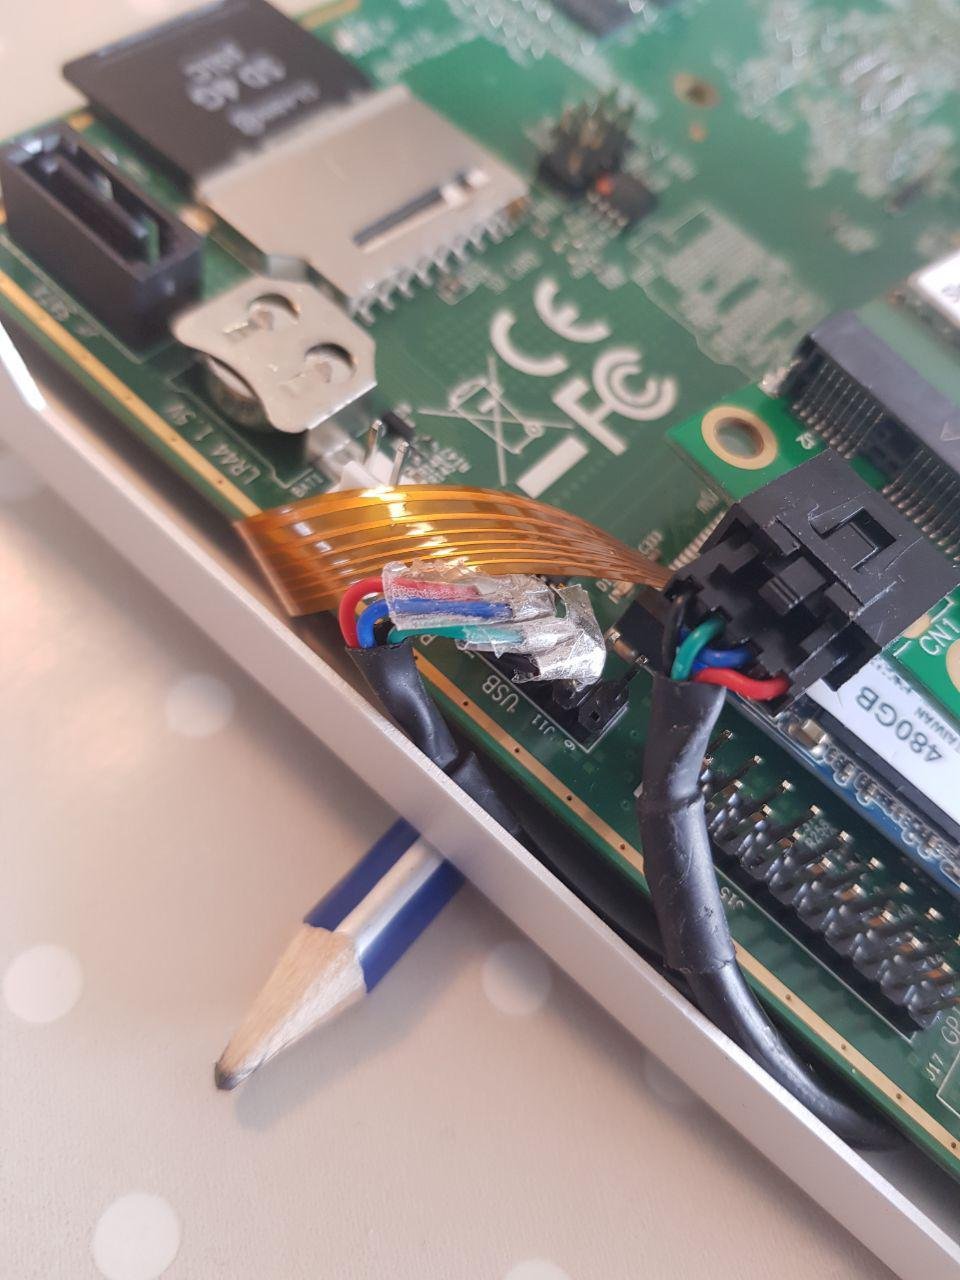
Fig: Close up of USB connection. Had to remove plastic casing to fit below the middle SMA connection for the WiFi antennas. Orange ribbon cable from SIM card extension. Will shorten the USB cable long-term. Will check if performance increases with external USB mPCIe adapter. Saw noticeable performance improvement in a different machine when the LTE card was moved outside to an external adapter.
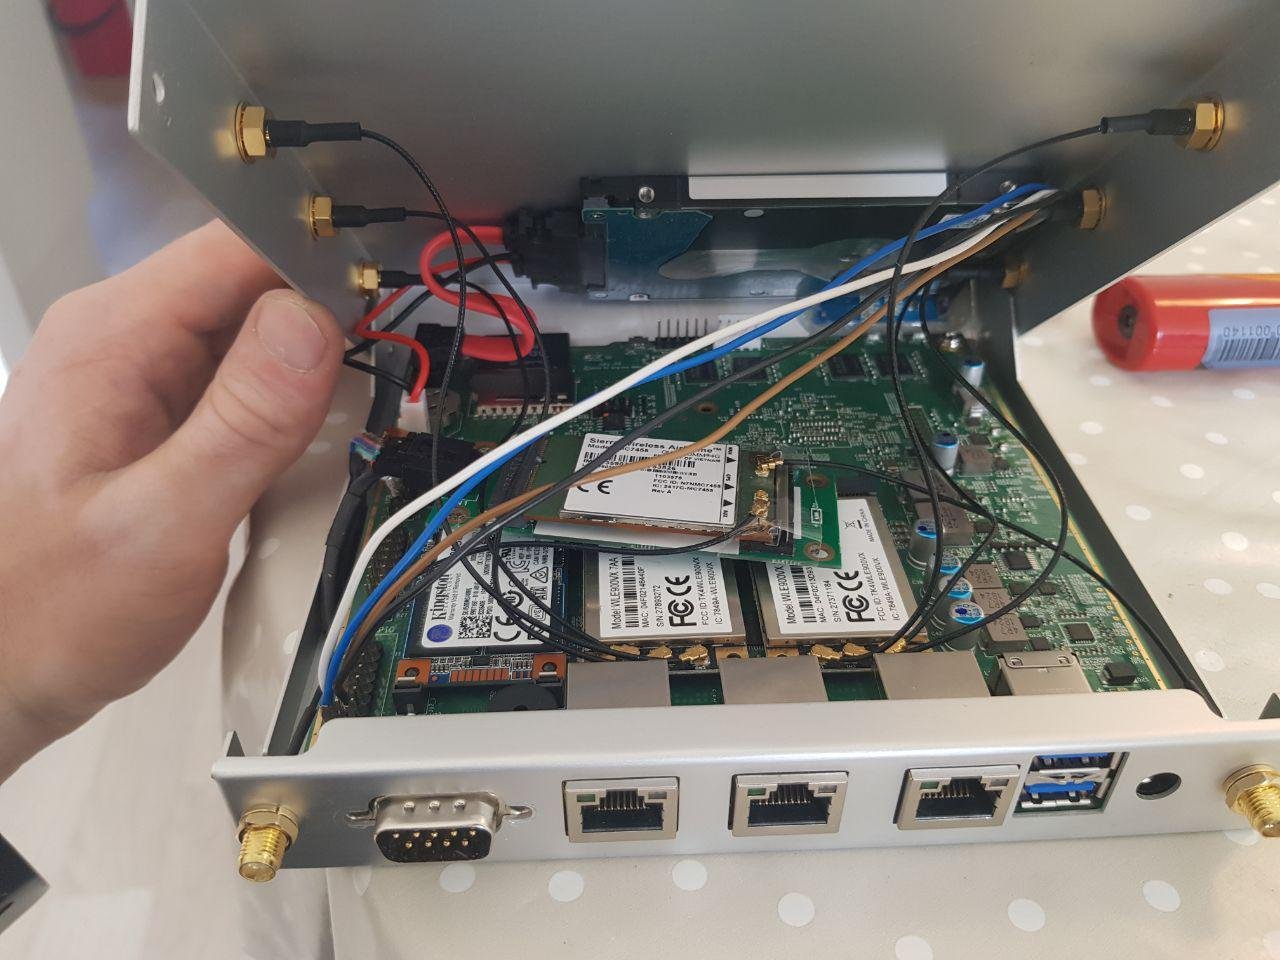
Fig: Internal view of chassis with everything installed. It’s tight but closes without any force. White, brown, blue and black cables running from the OLED screen to the GPIO header. Hard drive mounted with double sided tape.
In the end, I have a very compact and powerful router/mini-server that I can bring with me everywhere without having to worry about connectivity.
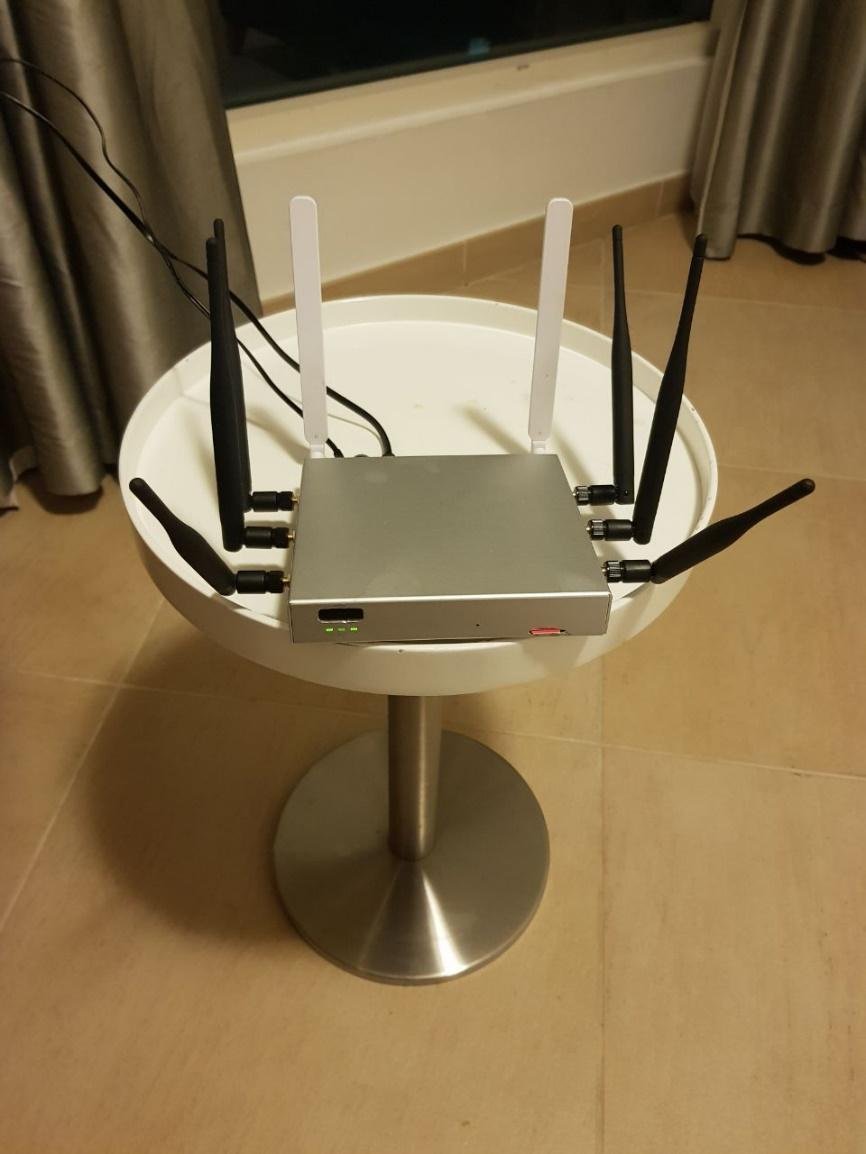
Fig: Router running smoothly from an undisclosed location in the Middle East
Final remarks
The hardware side didn’t take too long. 3-4 hours for assembly and dremeling. Figuring out everything on the software side did however take quite a while and is still very much a work-in-progress as I am by no means a software developer (this the first time I compiled my own OpenWRT firmware). I am very impressed with this box, and so far, it hasn’t let me down!
The software configuration is a long write and may come in a follow-up post. Long story short, a custom firmware had to be built (based on the excellent ROOter firmware (http://ofmodemsandmen.com/) to allow for LXC containers, and several custom scripts and modifications had to be made to get everything running reliably as I wanted.